
Learning how to add product labels to Shopify starts with one practical decision: what should a shopper notice, on which product, and where should the message appear? A useful label makes a real merchandising fact easier to see. It should not cover the product, invent urgency, or force you to maintain fragile theme edits.
This guide walks through a no-code workflow using LumenCanvas, from choosing a message to checking the live storefront. The same planning steps also help if your theme already includes a badge setting or if your team prefers custom Liquid and CSS.
TL;DR
- Start with one truthful message and one test product. A focused test is easier to preview, verify, and reverse than a store-wide campaign.
- Preview placement on desktop and mobile. Product images, prices, buttons, and descriptions leave different amounts of space on different themes.
- Enable the app embed, save the label, and inspect the storefront. A preview is a layout guide; the live theme remains the final check.
- Measure visibility before claiming impact. Impressions and clicks show engagement, but they do not prove that a label caused a sale.
Before you begin: define the message
Pick a message that a shopper can verify on the page. Good first tests include Sale when the displayed price is genuinely reduced, New in for a recent launch, or a factual shipping or material cue that is already supported by your store policies and product data. Avoid countdowns that reset, unsupported superlatives, and trust claims such as guaranteed delivery unless your business can substantiate them.
Know which storefront element you need
| Element | Best use | Typical location |
|---|---|---|
| Product label | A short product-specific cue such as New in | Product image or product information |
| Sale badge | A product label focused on a real discount | Near the image or price |
| Trust icon | A factual policy or service cue | Near relevant purchase information |
| Announcement banner | A broader campaign or store message | A page-level banner region |
Choose the smallest element that communicates the message clearly.
Choose theme settings, custom code, or an app
First check your theme editor. Some themes include a basic sale badge or product-card setting. This is the lightest option when its design, placement, and targeting match your campaign. The tradeoff is that built-in settings vary by theme and may not support multiple label types or product rules.
Custom Liquid and CSS offer more control, but they also create code that your team must test after theme updates. Use this route when a developer owns the change, understands your theme structure, and can keep a backup and rollback path. Do not paste an unknown snippet into a live theme simply to save a few setup minutes.
An app is useful when you want a visual editor, reusable label designs, product targeting, scheduling, or engagement reporting. LumenCanvas uses a Shopify theme app extension and a merchant-controlled app embed. It does not require you to edit theme code, but the embed still has to be enabled and saved in the theme editor before storefront elements can render. Shopify documents theme app extensions and app embed blocks in the official references at the end of this guide.
How to add product labels to Shopify step by step
1. Choose one product and one campaign fact
Select a product that is easy to find on your storefront and has a clear reason for a label. For a first pass, use a product you can inspect on both a product page and a collection page. Confirm that its title, price, availability, tags, and collections are current before building a targeting rule around them.
2. Create the label and keep it in draft
In LumenCanvas, open Labels and create a label. Start with a text label or a suitable built-in library image, then write the shortest message that still makes sense. Use Draft while you work. Check contrast, text size, shape, spacing, and whether the label remains readable over both light and dark areas of the product image.
If you use dynamic discount text, preview it against a product that actually has a compare-at price. A static Sale label is often the safer first test because its meaning and length are predictable.
3. Preview desktop and mobile
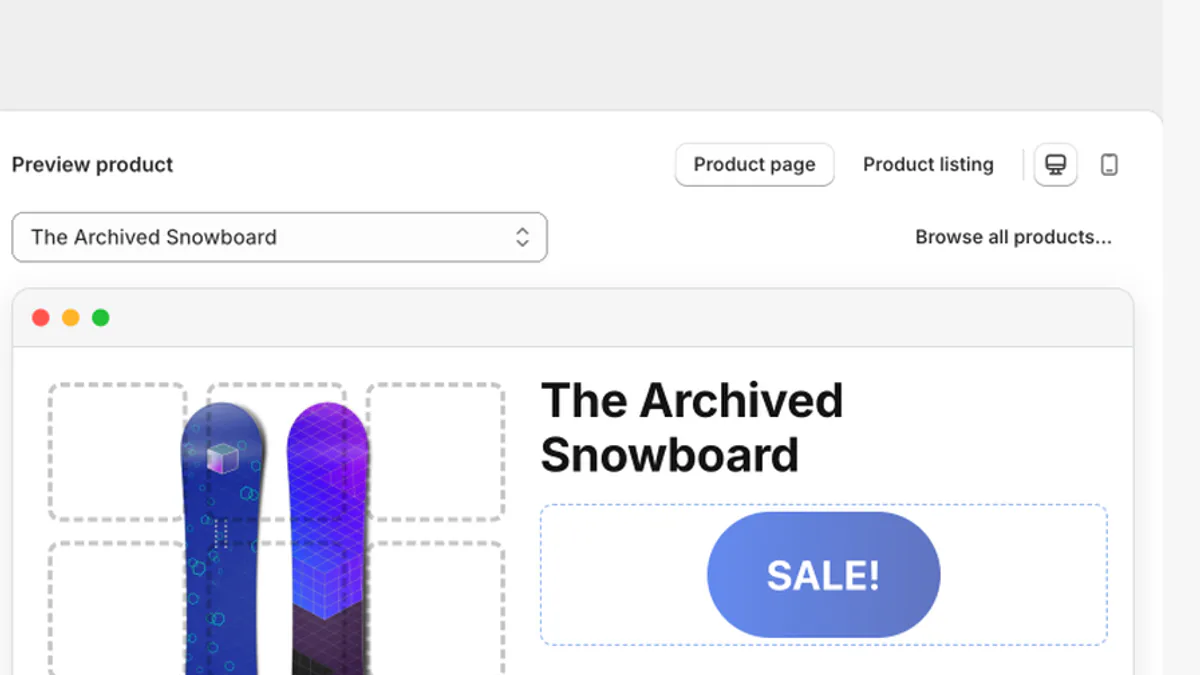
Choose the same product in the preview and switch between product page and product listing views where relevant. Then check both desktop and mobile modes. Look for three problems: the label covers an important part of the image, the text becomes too small, or the label competes with price and purchase controls. Adjust size and placement before changing more products.
4. Pick an image position or page position
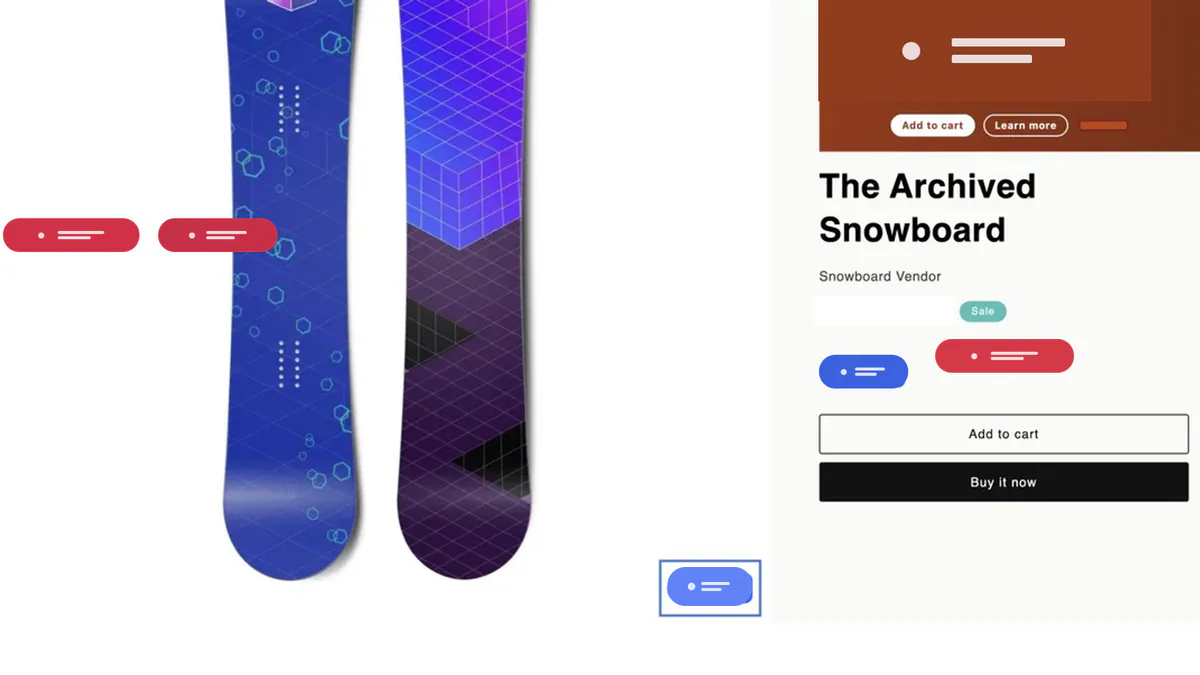
Image positions place the label over a defined area of the product image. Page positions place it near supported product information such as the price or add-to-cart region. Available page positions depend on the published theme structure. If a position is unavailable or unreliable in the current theme, choose a supported alternative instead of forcing it with a brittle selector.
5. Target only the intended products
For the first test, select the product directly. Once the result is correct, you can move to a rule based on collection or tag. LumenCanvas can calculate matching products before publication, so use that count as a reasonableness check. If you expected 12 products and see 120, stop and fix the rule rather than publishing first.
6. Enable the app embed
Open LumenCanvas Settings and follow the theme-editor link. In Shopify's theme editor, enable the LumenCanvas app embed and save the theme. App embeds are designed for theme-level app functionality and can be activated or deactivated through the theme editor. LumenCanvas reads the published theme status so Settings can report whether the embed is active; it does not write your theme for you.
7. Activate, save, and inspect the live storefront
Set the label to Active, save it, and publish the current storefront configuration. Open the targeted product in a new storefront tab. Check the main image, product information, purchase controls, and the same page at a narrow mobile width. Also visit a product that should not match. This negative check catches broad targeting rules that a single success page cannot reveal.
If the product label does not appear
- Confirm the app embed is active in the published theme, not only in an unpublished theme copy.
- Confirm the label is Active and that the latest configuration was saved or published.
- Recalculate targeting and verify that the current product is included.
- Try another supported placement if your theme does not expose the selected page region.
- Use Settings diagnostics to check product indexing, published configuration, recent runtime activity, and placement warnings.
Test in a normal storefront session after saving. Cached tabs and editor previews can show an older state, so refresh deliberately and allow a short propagation window before changing several settings at once.
Measure the label without overclaiming
After the label is live, record the publication date, targeted product count, and placement. LumenCanvas reports aggregate impressions, clicks, and add-to-cart events for published elements. Compare those signals over a meaningful period and keep the campaign stable while you observe it. A click shows interaction with the element; an add-to-cart event shows that the action occurred on a page where it rendered. Neither signal alone proves incremental revenue or causation.
Frequently asked questions
Can I add product labels to Shopify without editing theme code?
Yes. Your theme might include a basic badge setting, or you can use an app delivered through a theme app extension. LumenCanvas uses a merchant-controlled app embed, so you enable it in the theme editor without editing Liquid or CSS.
What is the difference between a product label and a sale badge?
Product label is the broader term for a short product-specific cue. A sale badge is a product label whose message communicates a genuine discount or promotion.
Why is my Shopify product label not showing?
The most common checks are embed status, label status, the saved storefront configuration, product targeting, product indexing, and whether the selected page position exists in the published theme.
Will a label look the same on every Shopify theme?
No universal pixel-perfect result can be promised because themes structure images and product information differently. Preview desktop and mobile, use supported positions, and inspect the live published theme before expanding the campaign.
What happens to labels if I uninstall LumenCanvas?
LumenCanvas storefront elements stop rendering after uninstall. The app is delivered through a theme app extension and does not require copied theme snippets that you must remove manually.
Sources and further reading
- Shopify Developers: Theme app extensions
- Shopify Developers: App embed blocks
- Shopify Developers: App blocks for themes
Add your first Shopify product label
Now you know how to add product labels to Shopify without editing theme code. The safest first campaign is deliberately small: one truthful message, one product, one placement, and a live desktop and mobile check. Review the LumenCanvas product page for the current workflow and feature scope.
Ready to build that first test? Install LumenCanvas and keep the label in draft until you have checked both preview modes and the live storefront.